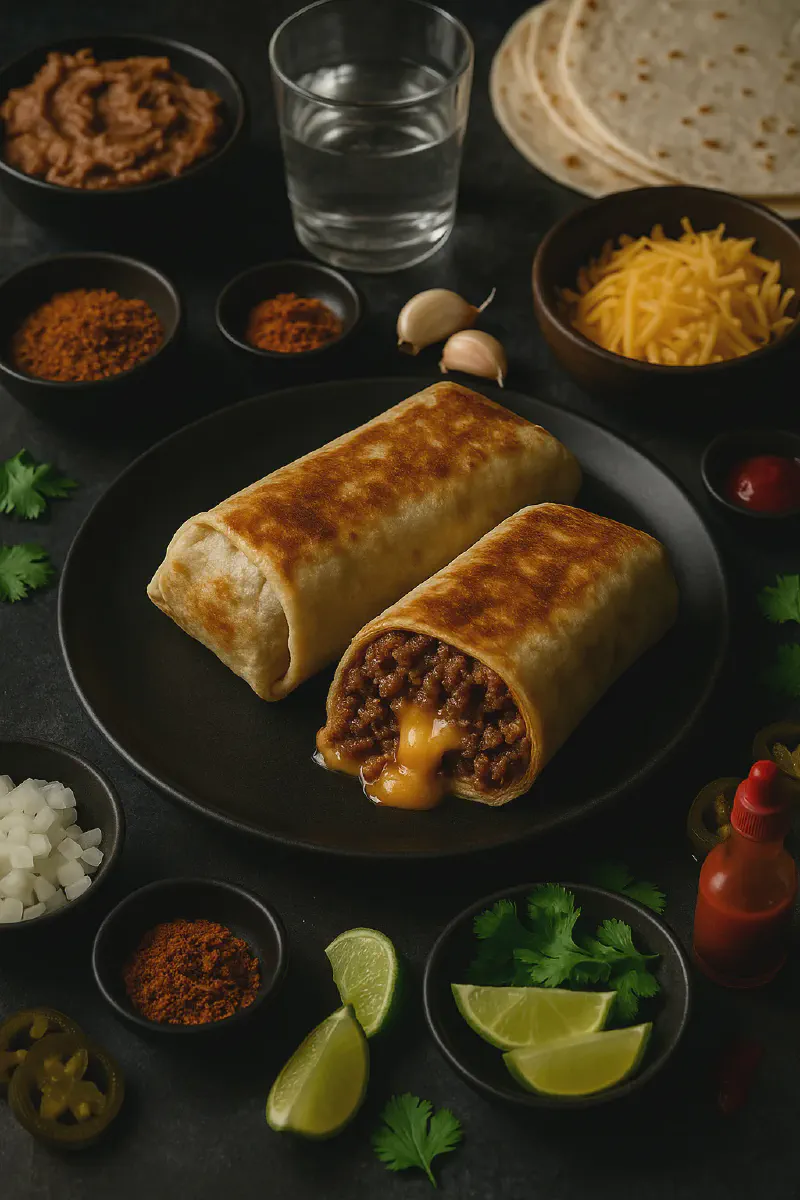
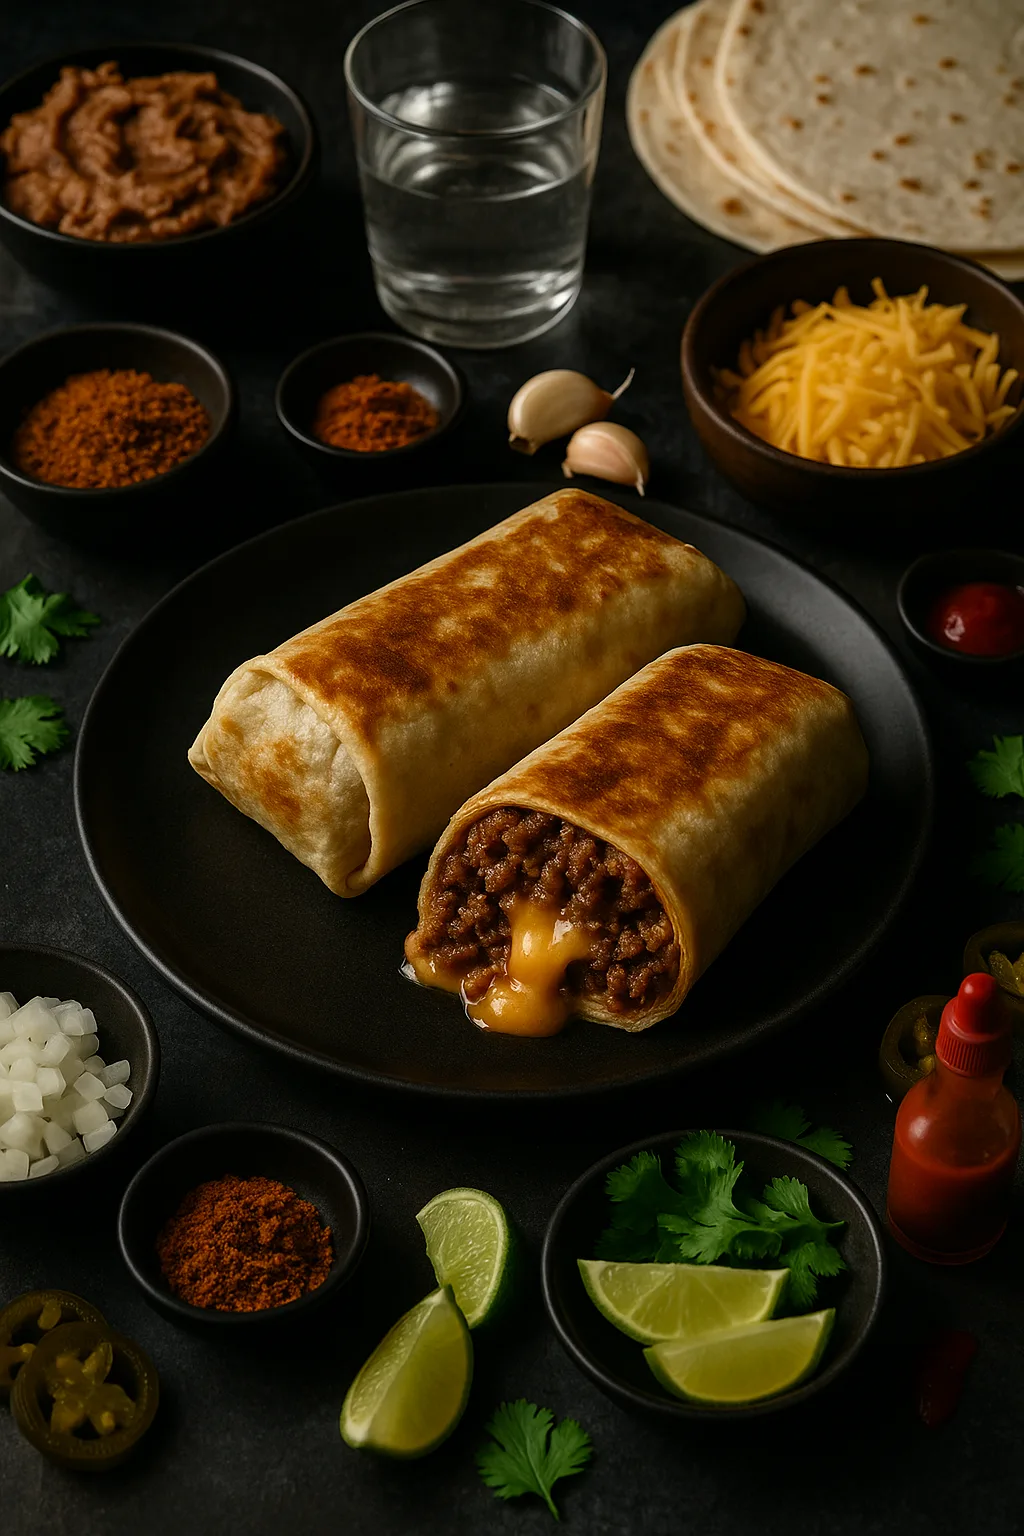
—# Beef and Bean Burritos That Actually Stay Together Creamy Refried Bean Edition
You know those dinners that feel like a warm hug? That’s these Beef and Bean Burritos. They’re soft, melty, a little saucy, and exactly the kind of easy weeknight dinner I reach for when my brain is done for the day but my stomach still wants something good.
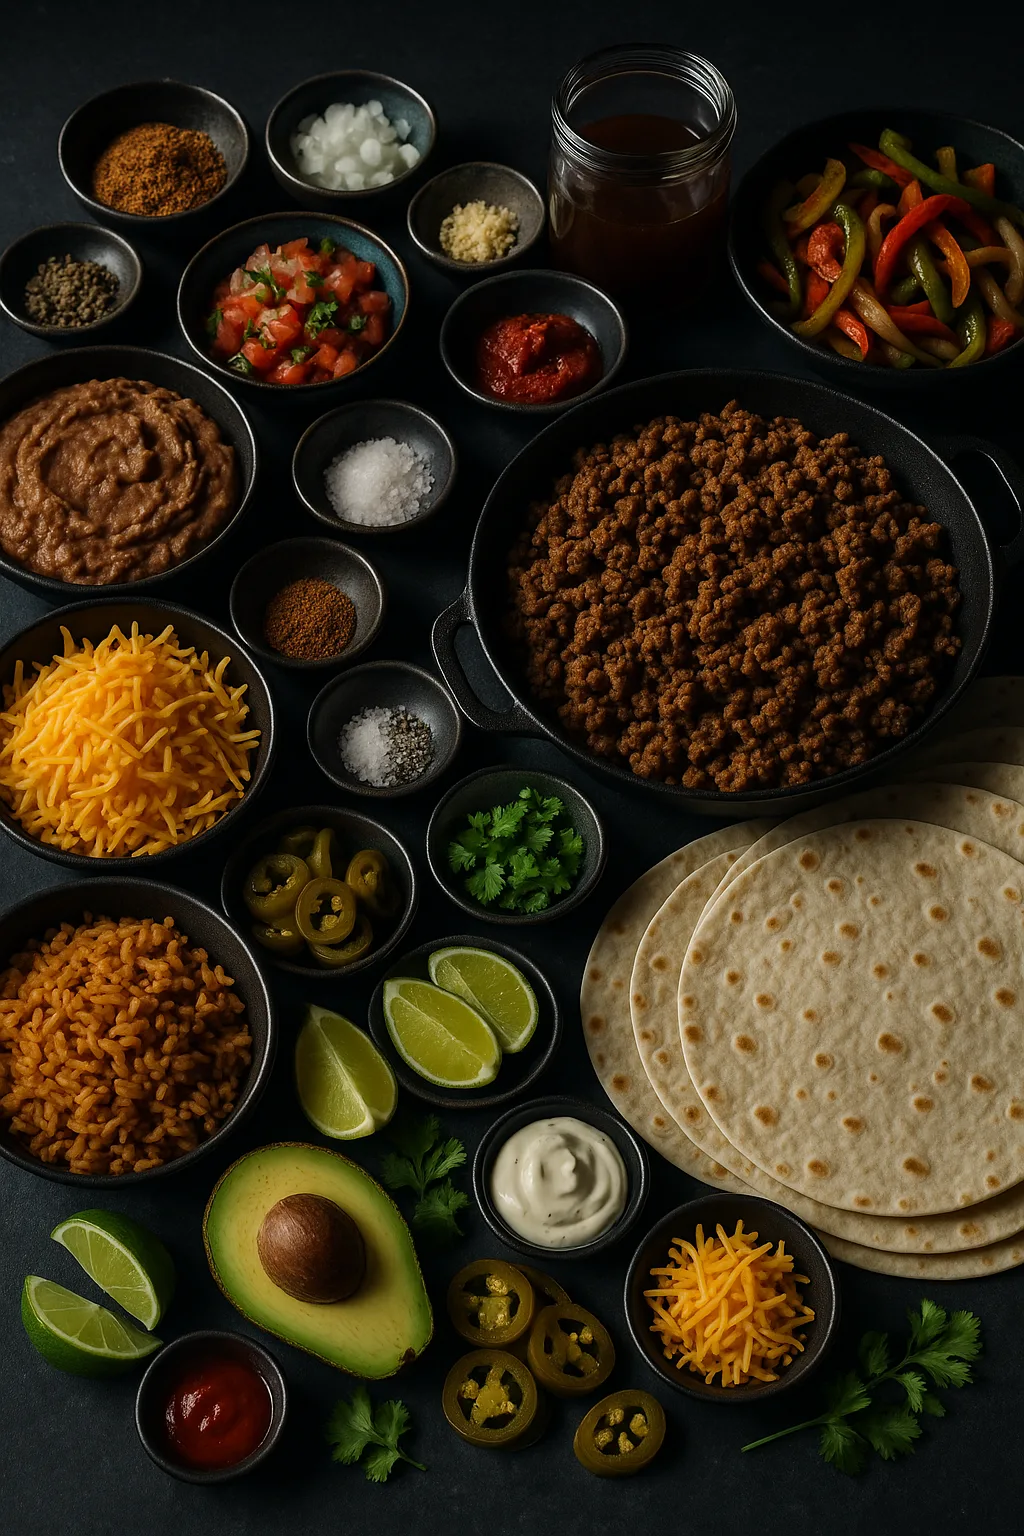
We’re going full-on Mexican-inspired comfort: well-seasoned ground beef, creamy refried beans, and gooey cheese all tucked into toasty flour tortillas. If you love cheesy burritos, we are absolutely on the same team.
I make these when I want minimal dishes, maximum flavor, and leftovers that behave (aka they reheat well and don’t fall apart). They’re super customizable just add rice, swap cheeses, spice it up or keep it mild. Your call.
And honestly? Burrito night just has a fun, “let’s hang on the couch and watch something” energy. Comfort food but still fresh, bright, and satisfying.
Why You’ll Love These Beef And Bean Burritos
These burritos are the definition of low effort, high reward. They’re quick to cook, easy to fold, and they freeze like a dream.
- Fast & forgiving: Perfect for an easy weeknight dinner.
- Make-ahead magic: Great for meal prep lunch and they reheat beautifully.
- Kid-approved: Totally family-friendly, but you can add heat for spice lovers.
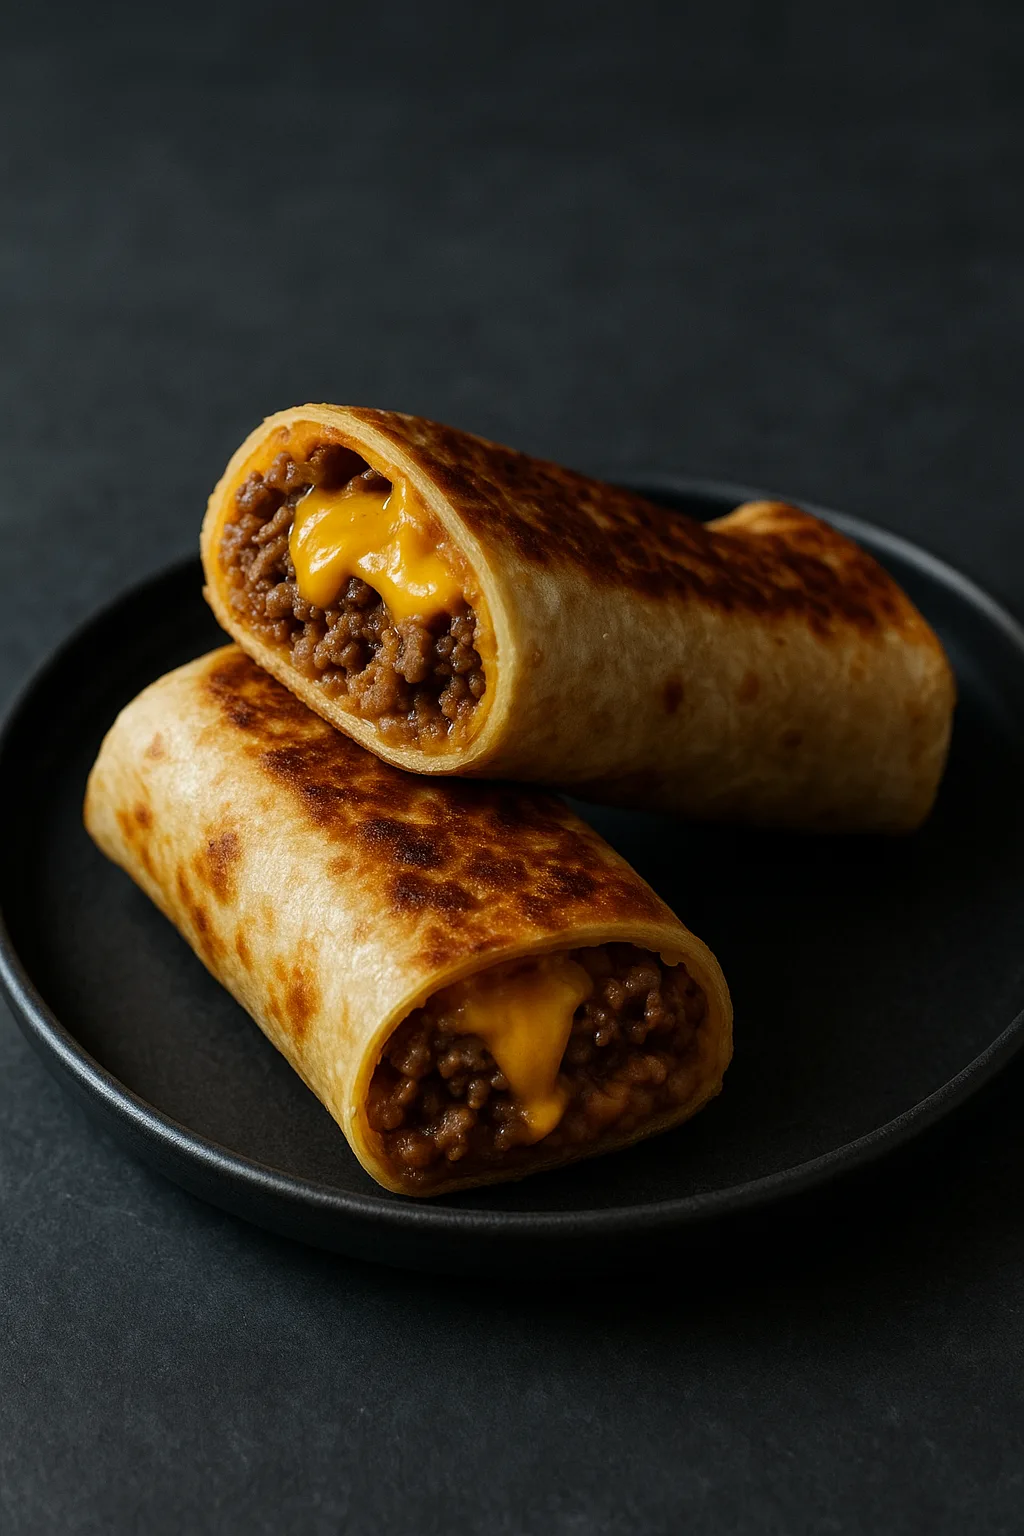
- Restaurant finish: Toast for griddled burritos with a golden, crisp exterior.
Variations & Substitutions
Level-ups I love: sautéed peppers and onions, a scoop of cilantro-lime rice, or a drizzle of chipotle crema before rolling. For a glossy restaurant-style finish, brush the burritos with a tiny bit of oil and griddle them seam-side down until crisp.
Ingredient flexibility: swap ground beef for ground turkey or plant-based crumbles, use any melty cheese (Monterey Jack, cheddar, or pepper Jack), and if you don’t have my Homemade Taco Seasoning, a store-bought packet works in a pinch.
When This Recipe Fits the Mood
Weeknights, game nights, study nights—these burritos are unfussy champions. They’re also ideal when you want a tidy meal prep lunch just wrap, chill, and reheat without sogginess. Building a freezer stash? These are A+ freezer friendly burritos.
What to Serve This With (5 Easy Ways to Make a Healthy, Complete Meal)
Pick one (or two!) to round out dinner with veggies, fiber, and freshness:
- Citrus Slaw – Shredded cabbage + carrots with lime-yogurt dressing; bright, crunchy, and light.
- Charred Corn & Pepper Salad – Quick skillet corn, red pepper, green onion, squeeze of lime; sweet heat and fiber.
- Simple Romaine-Avocado Salad – Romaine, avocado, radish, and a lime vinaigrette; creamy + crisp without feeling heavy.
- Fajita Veggies – Sautéed bell peppers and onions with a pinch of cumin; fast, colorful, and meal-prep friendly.
- Cilantro-Lime Brown Rice or Quinoa – Whole grains for staying power; add lime zest and a splash of broth for flavor.
Mini Burritos (Taco Kit Option)
Using the small tortillas from a taco kit? Do this:
- Yield: Makes 8–10 mini burritos using 6-inch tortillas.
- Seasoning: Use 3 tbsp Homemade Taco Seasoning or the kit’s seasoning packet (usually ~2–3 tbsp). Start with 2 tbsp, taste, and add more as needed.
- Hot sauce: Use the kit’s hot sauce as a finishing drizzle after crisping, or stir 1–2 tsp into the filling (Step 4) for a gentle kick.
- Portioning: Add 2–3 tbsp filling + 1–2 tbsp cheese per tortilla. Small tortillas tear easily if overfilled.
- Rolling tips: For true “mini burritos,” fold the bottom up, tuck, then roll (sides will only partially fold—totally fine). Prefer super tidy rolls? Make taquito-style: skip side folds and roll tight from the bottom; place seam-side down to seal.
- Crisping: Skillet 45–60 seconds per side, or air fry at 350°F / 175°C for 4–6 minutes from chilled (flip once). From frozen, air fry 330°F / 165°C for 10–12 minutes; for best texture, start in foil 6–8 minutes, then unwrapped 2–3 minutes to crisp.
- Serving: Pile minis on a platter with lime wedges, pico, and the kit’s hot sauce for dipping.
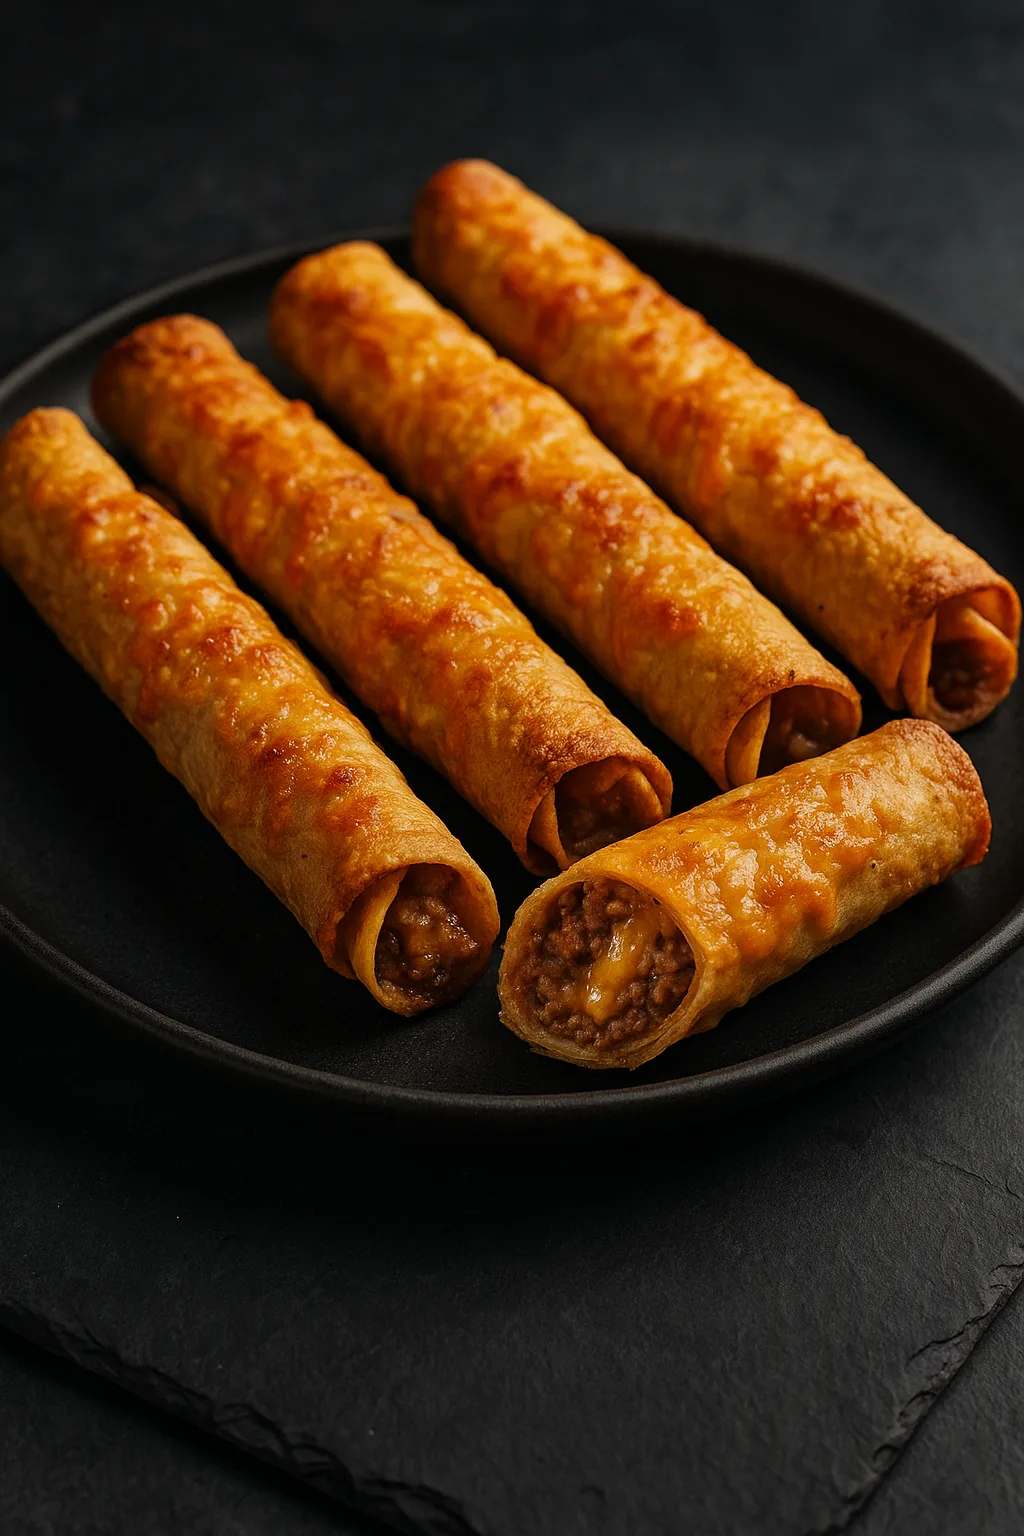
New! Taquito Option (Rolled Tacos)
All the flavor, extra crunch. Use small (6-inch) taco-kit tortillas are perfect. How to roll:
- Warm tortillas until pliable.
- Spread a thin line (2 tbsp) of the hot beef–refried bean mixture across the lower third.
- Add 1 tbsp cheese on top (optional).
- Roll very tight from the bottom without folding the sides (taquito-style). Place seam-side down.
- For insurance, you can toothpick the seam (remove after cooking).
Air Fryer Taquitos (fresh or chilled)
- Prep: Lightly mist taquitos with oil or brush with a thin film.
- Temp/Time: Air fry at 375°F / 190°C for 7–10 minutes, flipping once at 5 minutes, until deeply golden and crisp.
- Tip: Don’t overcrowd; leave space so edges crisp. Internal temp should hit 165°F / 74°C.
Deep-Fried Taquitos (fresh)
- Oil: Heat neutral oil to 350°F / 175°C in a deep pot (2–3 inches).
- Fry: Add taquitos seam-side down in batches; fry 2–3 minutes until golden.
- Drain: Lift with tongs, let excess drip, and set on a wire rack (best) or paper towel. Sprinkle with a pinch of salt while hot.
Freeze-Ahead Taquitos (uncooked)
- Arrange rolled taquitos on a parchment-lined sheet pan, seam-side down, not touching.
- Freeze solid (2–3 hours), then transfer to a zip-top bag. Label/date; freeze up to 2 months.
- Cook from frozen—no thawing needed (crisper + safer).
Deep-Frying Frozen Taquitos
- Oil Temp: Keep at 350°F / 175°C (use a thermometer).
- Fry Time: 3–5 minutes, turning as needed, until deeply golden and the center is 165°F / 74°C.
- Safety: Brush off any obvious ice crystals; add carefully to avoid splatter. Fry in small batches to maintain temperature.
- Pro move: Hold each taquito seam-side down with tongs for the first 10–15 seconds so it seals before it floats.
Toppings: Inside vs Outside + Layering Order
Put inside before folding (great warm-inside toppings):
- Shredded cheese (near the seam = “glue”)
- Hot beef–refried bean filling
- Cooked rice
- Sautéed peppers/onions
- Pickled jalapeños or a little hot sauce
Keep outside (add after heating/crisping):
- Salsa or pico de gallo (too wet inside = soggy)
- Sour cream/crema (melts and leaks if inside)
- Guacamole/avocado slices (okay inside if eating now, not for meal prep)
- Shredded lettuce, diced tomato, fresh herbs/pickled onions (stay crisper on top)
Layering order that works every time:
- Warm tortilla → 2) Thin line of cheese near the seam → 3) Beef–bean filling → 4) Rice (if using) → 5) Sautéed veg/jalapeños → 6) More cheese (optional) → 7) Fold sides, roll tight → 8) Crisp → 9) Finish with cool toppings on the plate.
Smart Tips (From My Kitchen to Yours)
- Cheese = glue. Sprinkle cheese near the seam so it melts and seals everything shut (the refried beans help “paste” the filling together too). Melting a ½ cup into the filling (Step 4.5) adds body and creaminess.
- Right saucy-ness. You want “cozy and moist,” not “leaky.” If it’s too thick, splash in more water; too wet, simmer a minute longer.
- Don’t overfill. The #1 burrito/taquito break reason is “ambition.” A modest scoop rolls tighter and eats better.
- Freezer win. Cool completely, wrap large burritos snugly in foil; taquitos freeze best uncooked on a tray, then bagged.
- Air fryer reheating (burritos): From chilled: 350°F / 175°C for 6–8 minutes (flip once). From frozen: 330°F / 165°C for 12–16 minutes (foil 8–10, then 3–5 unwrapped). Minis need a bit less.