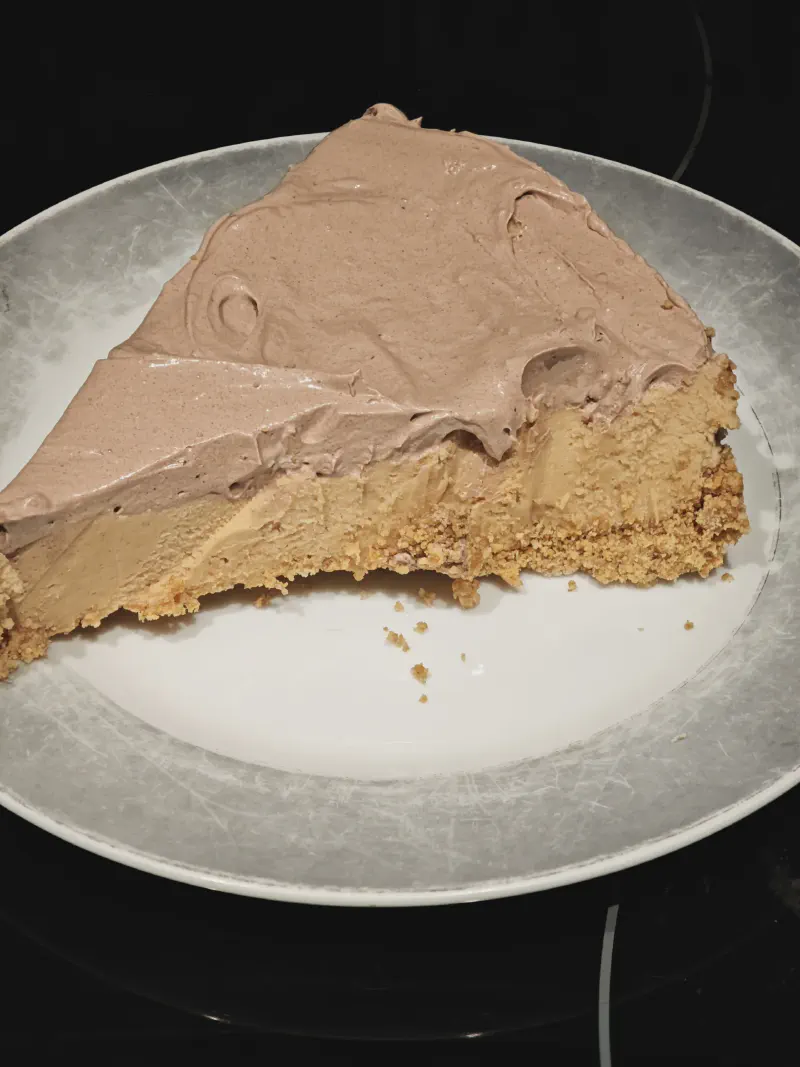
Smooth, Silky, Chilled Perfection — No Oven Needed
The first time I made this no bake peanut butter pie, I knew it was dangerous. It is one of those creamy, cold, soft-set desserts you keep sneaking a forkful of every time you walk by the fridge. It is light yet rich, sweet yet not cloying, with that perfect peanut-butter-meets-velvety-cream-cheese thing going on. Honestly, it tastes like a peanut butter cloud parked on a buttery graham cracker crust, finished with a glossy chocolate layer that sets up slightly firm but melts on your tongue.
This recipe has been on my mind lately — something about the chilled peanut butter filling paired with that chocolatey, pillowy whipped topping feels like a hug and a high-five at the same time. And because we are using whipped topping instead of homemade whipped cream, the filling comes together even easier. No standing at the mixer worrying about over-whipping. No guessing at soft peaks. Just fold in that light, stable whipped topping and boom — dessert magic in under fifteen minutes of active time.
If you love creamy peanut butter dessert moments but hate heating up the kitchen, this is your sign. This no bake pie recipe sets beautifully in the fridge, slices cleanly with a hot knife, and tastes like something you would proudly serve at a summer barbecue, a holiday dinner, or honestly, a regular Tuesday night when you want something a little special.
Why You Will Fall For This Pie
There is something irresistible about a graham cracker crust pie with cool, fluffy filling — it is nostalgic but a little fancy too. This one brings the best of both worlds: a silky peanut butter cream cheese filling that holds its shape when sliced, topped with a rich chocolate cloud that contrasts beautifully against the nutty, sweet base.
The magic of this dessert starts with the crust. Graham cracker crumbs bound with melted butter create a base that is slightly sweet, buttery, and sturdy enough to hold together when you slice through the soft filling. Pressing it firmly into the pan and letting it chill before adding the filling ensures it sets up properly and does not crumble when you take your first bite.
The filling itself is a study in balance. Cream cheese brings a slight tang that keeps the sweetness in check. Peanut butter adds that rich, nutty, slightly salty depth that makes this pie feel indulgent without being heavy. The whipped topping lightens the whole mixture, making each bite feel airy and effortless. And the chocolate topping? It is the finishing touch that makes people stop and close their eyes on the first bite, because the combination of cold chocolate and creamy peanut butter is just that good.
The Make-Ahead Advantage
One of the best things about this no bake peanut butter pie is how well it adapts to your schedule. Because it needs at least three hours to set in the refrigerator — and actually tastes better after chilling overnight — you can make it a day or two before you need it. This makes it an ideal dessert for entertaining, because you can completely finish the dessert ahead of time and simply pull it out of the fridge when you are ready to serve.
For a summer potluck or backyard cookout, this is a genuine lifesaver. You are not scrambling to finish a dessert while everything else is coming together. You mix it up, press the crust, fill it, chill it, top it, and forget about it until serving time. The pie travels well, too — just keep it cold until the last possible moment, and it holds up beautifully.
Fun Twists and Simple Substitutions
If you want to switch things up, there is plenty of room to play with this recipe without losing what makes it special. Swap the graham cracker crust for chocolate wafers for a deeper cocoa vibe that pairs especially well with the peanut butter filling. Use natural peanut butter if you prefer a more intense, slightly less sweet peanut flavor — just note that the texture may be slightly runnier since natural peanut butter lacks the stabilizers found in conventional brands.
For extra texture in your creamy dessert, fold in half a cup of chopped salted peanuts or miniature chocolate chips into the filling before spreading it into the crust. You can even layer the bottom of the crust with a thin spread of chocolate hazelnut spread before adding the peanut butter filling for a combo that will have people asking for the recipe before they finish their first bite.
If you want a less sweet dessert, reduce the powdered sugar by a few tablespoons — the filling still dreams up creamy and rich, just with a bit less sugar. And if you need a gluten-free option, choose a certified gluten-free graham cracker crumb and the rest of the recipe stays exactly the same. Nobody will know the difference.
For the chocolate topping, add a spoonful of melted semi-sweet chocolate or a tablespoon of chocolate hazelnut spread to the whipped topping mixture before spreading it over the pie. This creates a darker, more intense chocolate finish that chocolate lovers will appreciate. Alternatively, skip the cocoa entirely and finish the pie with a layer of chocolate ganache — just heat heavy cream and pour it over chopped chocolate, let it sit, then stir until smooth.
Perfect Moments to Make This
This no bake peanut butter pie feels right for pretty much any occasion. It is always a hit at birthdays, potlucks, game day spreads, or late-night dessert cravings. Because it chills beautifully and slices cleanly, it works especially well when you need a dessert that can sit out for a while without melting or degrading — a genuine concern with anything containing whipped cream.
Serve it after a cozy winter dinner alongside a cup of coffee or hot tea. Bring it to a family gathering where the dessert table is always crowded with heavy cakes and pies — this lighter, cooler option will stand out. Keep a slice in the fridge for those “I need a bite of something sweet” moments that hit after dinner. If you are a peanut butter lover, this one is going to become a rotation regular.
What You Will Need
For the Graham Cracker Crust
The foundation of this pie is a simple mixture of crushed graham crackers, sugar, and butter. You will need about eleven full graham cracker sheets to yield one and a half cups of crumbs. Pulse them in a food processor, or place them in a zip-top bag and crush them with a rolling pin — both methods work well. Mix the crumbs with granulated sugar, then stream in the melted butter while stirring. The mixture is ready when it holds together when you squeeze it in your fist, like wet sand that clumps.
Press this mixture firmly into a nine-inch pie dish, working it up the sides as evenly as possible. Use the flat bottom of a measuring cup or a glass to press the crust down and create a smooth, compact layer. Chill the crust for at least fifteen minutes before filling — this helps it set up firm enough to support the soft filling without crumbling.
For the Peanut Butter Filling
The filling comes together in three stages. First, beat the softened cream cheese and peanut butter together until completely smooth — about two minutes on medium speed. Second, add the powdered sugar and vanilla and beat on low until just combined, then bump the speed up for another thirty seconds until fluffy. Third, fold in the whipped topping gently, using a wide spatula and stopping as soon as everything is evenly blended.
The key here is softness — literally. Make sure your cream cheese is truly softened to room temperature before you begin. Cold cream cheese will leave lumps in your filling no matter how long you beat it, and those lumps will persist through the chilling process. If you forget to set out your cream cheese ahead of time, unwrap it and microwave it in ten-second intervals until it gives way when you press it gently with your finger.
For the Chocolate Topping
This topping is simplicity itself: whipped topping stirred together with cocoa powder, powdered sugar, and vanilla. The key is to make sure the powdered sugar and cocoa are fully dissolved and incorporated so you do not end up with pockets of dry powder in your otherwise smooth topping. Sift the cocoa and powdered sugar together before adding them to the whipped topping if you want to be extra certain of a smooth result.
Extra Tips to Elevate This Dessert
For cleaner slices, pop the pie into the freezer for fifteen minutes right before serving. The slightly firmer surface makes it much easier to cut clean, clean lines, especially if you run your knife under hot water and wipe it dry between cuts.
If you want a stronger peanut butter flavor, use a heaping cup of peanut butter instead of a flat one. For a more intense chocolate finish, sift in a little extra cocoa powder to the topping, or stir in a tablespoon of melted dark chocolate. And if you are prepping this as a make-ahead dessert, it keeps beautifully in the refrigerator for three to four days, or in the freezer for up to a month — just thaw it overnight in the fridge before serving.
One more thing: do not skip pressing plastic wrap directly onto the surface of the filling before refrigerating. This prevents a skin from forming on top of the pie, which is especially important given the long chill time this dessert needs. The skin is not harmful, but it is not pleasant to bite through, and pressing the wrap down is an easy step that makes a meaningful difference in the final texture.
Finally, when you slice this pie, go slow and let the knife do the work. Because the filling is so soft and creamy, a sawing motion will just smear the filling rather than cut it cleanly. One long, steady draw of a hot, wet knife through the pie will give you those beautiful, Instagram-worthy slices that showcase the distinct layers — chocolate on top, creamy peanut butter filling beneath, and the buttery graham crust at the base.