The Story
The short answer
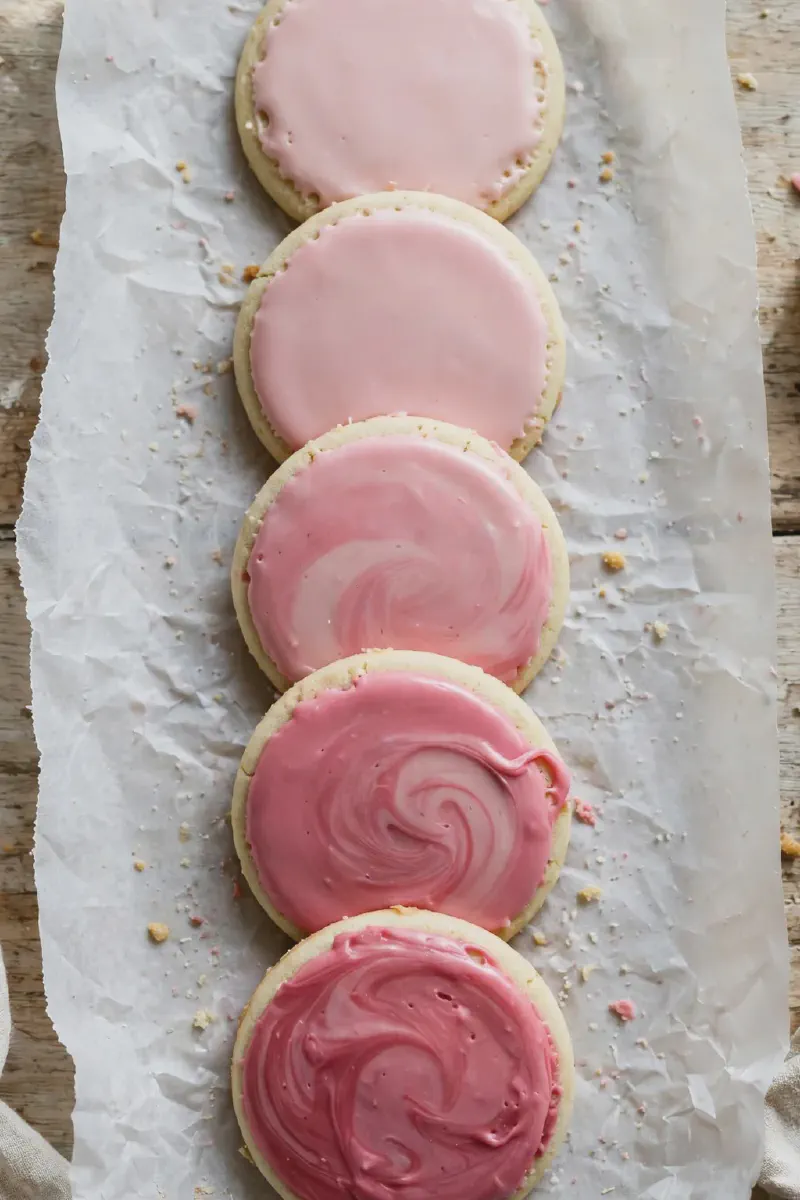
Chrissy Teigen’s ombré iced sugar cookies are plain vanilla sugar cookies under a marbled coat of milk icing, and the gradient comes from dipping rather than piping. Icing colours are layered in a small bowl, each cookie goes in top side down, and the colours settle into soft bands as the excess drips off. The baking itself is brief. Most of the roughly 3 hours the recipe takes is chilling, cooling, and waiting for the icing to firm up.
The recipe comes from Teigen’s Cravings line, and it is built backwards from the decorating. Everything about the cookie underneath is deliberately plain: a standard butter and vanilla dough with flour, baking powder, fine sea salt, granulated sugar, an egg, and vanilla, with no rolling and no cutting anywhere in it. That plainness is the point. A cookie with a strong flavour of its own would fight the icing, and a cut out cookie with raised or uneven edges would take the dip badly. This one stays out of the way and gives the colours a flat canvas.
A cookie designed to be dipped
After an hour in the fridge, the chilled dough gets divided into 16 pieces about the size of a walnut, rolled into balls, and pressed flat by hand into rounds about 2 inches across. They bake at 350°F (177°C) for 10 to 11 minutes, until the edges are just turning golden, and the yield is 16 cookies.
Hand pressing does two things a rolling pin and cutters would undo. It keeps every cookie close to the same thickness, so the batch bakes evenly, and it leaves the tops level and smooth, with no raised rim and no flour dusted across the surface. A level top matters more than it sounds. The icing that follows is thin and fluid, and it reads every bump and tilt in the surface beneath it. The chill before portioning matters for the same reason: butter that goes into the oven cold holds the pressed shape instead of slumping, so the rounds stay rounds.
The dip does the decorating
The icing is as plain as the cookie: confectioners’ sugar whisked with whole milk, nothing else. There is no butter in it and nothing to whip. That puts it in a different family from a spread frosting like chocolate frosting, which is beaten into something that holds its shape on a knife. This icing is supposed to flow. It levels itself across the cookie top, then sets into a thin and glossy skin.
The colour work happens in a ramekin or a small bowl just a little wider than a cookie. About 1/4 cup of one colour goes in first, then 2 Tbsp of a second colour is floated on top of it. The cookie is pressed in top side down, lifted straight out, and held for a moment while the excess runs back into the bowl. The top colour coats the centre and the colour underneath wraps the edges, and where the two meet they drag into each other and marble. A toothpick dragged through the wet surface adds a deliberate swirl, and a drop or two of extra colouring landed straight on the wet icing gives a brighter pop than the mixed shades do. The layered icing gets used up as you go, so top it up and adjust the layering whenever the colours start coming out muddy or thin.
Two things decide whether a dipped cookie looks clean. The cookies have to be completely cool before any of them touch icing, because a warm cookie melts the surface on contact and the coat slides instead of setting. And the drip needs patience: lift the cookie, let the loose icing fall, and only then set it down icing side up on parchment. Cookies parked too fast carry a puddle with them and dry with a thick foot of icing around the base.
Building shades that read as a gradient
An ombré is one colour in steps, light to dark, and the recipe builds the steps from a single divided base. The base gets split across bowls and colouring goes into each one in small additions until the bowls sit in a row from pale to deep. Working from one base keeps the family resemblance between the shades. Five unrelated colours dipped the same way would marble just as well, but they would not read as a gradient.
Thickness is the other half of the control. The icing wants to be thick but still pourable, closer to ribboning off the spoon than to running like water. Milk a few drops at a time loosens a batch that drags, and confectioners’ sugar a pinch at a time firms up one that runs. Icing that is too thin slides off the edges and leaves the cookie showing through in streaks. Icing that is too thick sits where it lands and dries rough instead of glossy. Test on one cookie before committing to a bowlful, because the first dip tells you more than the spoon does.
Most of the clock is waiting
The active work is short. Mixing the dough and the icing together account for about 15 minutes of prep, and the bake is 10 to 11 minutes. The rest of the roughly 3 hours is spoken for: an hour of chilling, a full cool down after the bake, and then 1 to 1 1/2 hours for the dipped icing to firm up before the cookies can be handled or stacked.
That split makes the recipe easy to divide across two days. Uniced cookies keep for up to 4 days in an airtight container, so the baking can happen one day and the dipping the next. What does not compress well is the setting time at the end. Cookies moved before the icing firms will fingerprint, smear against each other, and lose the clean surface the whole method exists to produce.
Finished cookies keep in an airtight container for up to 4 days, the same window as the uniced ones. Once the icing has firmed completely, the cookies can be layered with parchment between the rows so the glossy tops do not mark each other in the container.